Part I
Today we’re going to build something exciting together and you guessed right - it has to do with the Internet of Things.
As we do more and more IoT business for our clients, we as software developers also get more and more into the hardware part of the equation. Which is an important part when you truly want to understand and solve a problem.
To achieve this and to share my knowledge with you in the best possible way, I made a project that will will help illuminate what’s behind IoT. You don’t need much hardware to follow along, here’s what you need:
- An ESP8266 Board. I use and recommend a NodeMCU Dev Board. $2-5 from China. $8 Amazon
- An DHT11/DHT22 Sensor (Humidity + Temperature Sensor). $1 or less from China. $3 Amazon
There will be more requirements throughout this series, I will mention them as they come up.
What are we going to build?
To start off we’re going to build an easy temperature + humidity sensor station, similar to what my colleague Bryan built with an Arduino. Once that is done, the plan is to extend our software by adding MQTT as a communication protocol.
Finally, we want to integrate all of that with an Amazon Alexa Skill - both with a traditional JSON interface and the MQTT interface so we can clearly see the implementation differences.
Let’s start
In this part of the series we’re going to attach our temperature and humidity sensor to our ESP8266 module and make the data available over WiFi and HTTP. Before we can do that, let’s understand what hardware we got here.
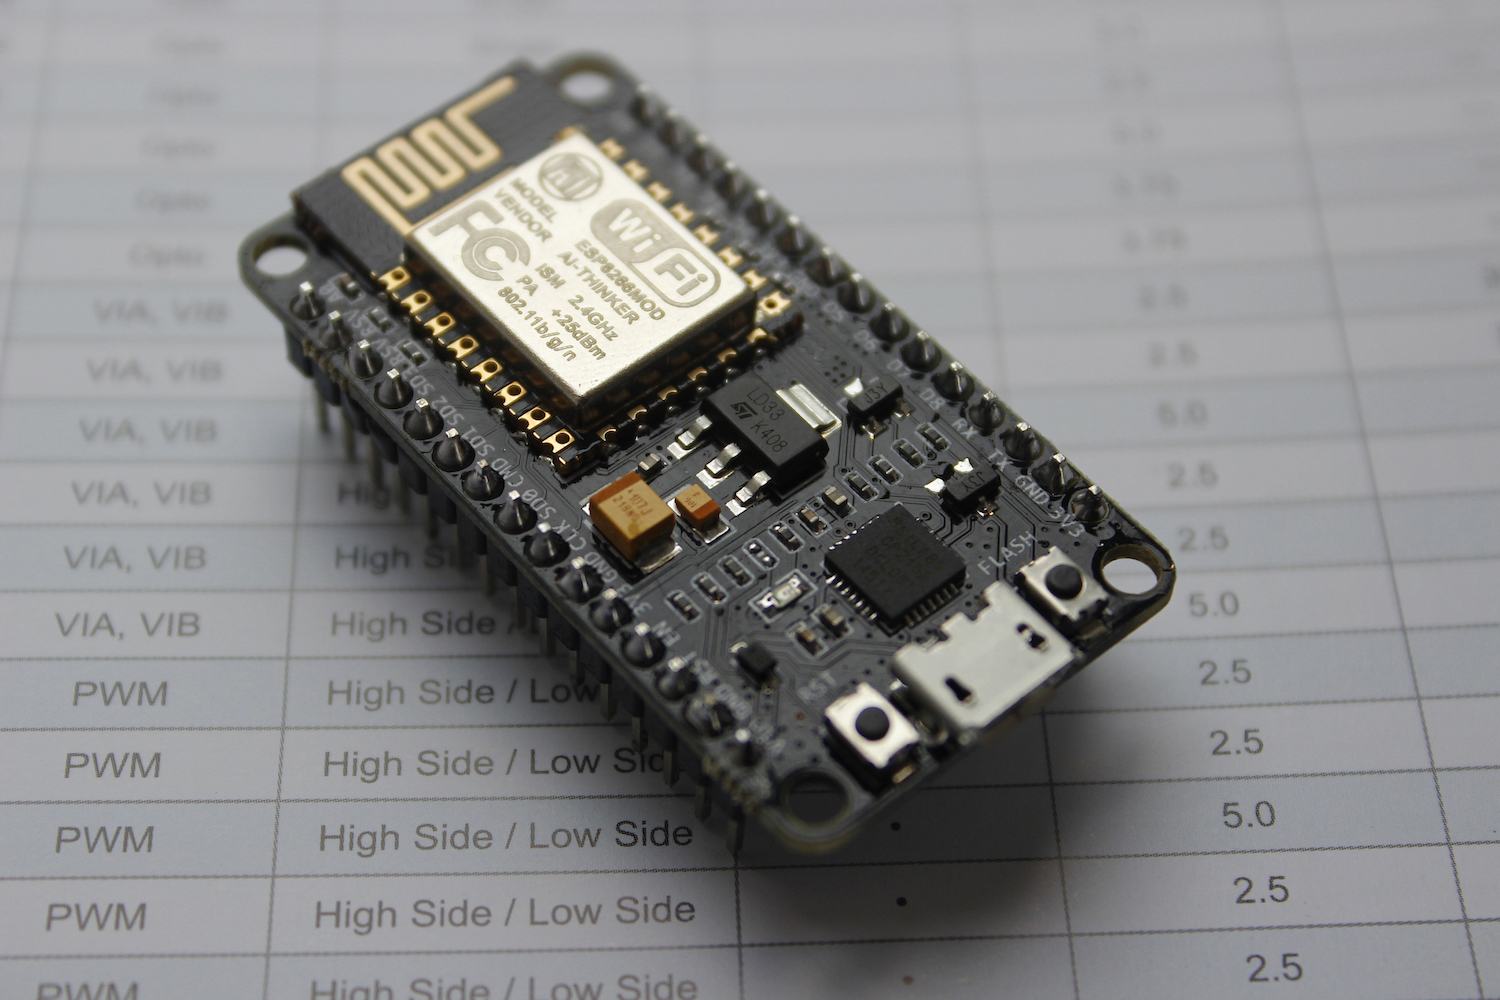 Image Source: https://blog.squix.org
The module in question here is a NodeMCU v2 Board. The version 2 of this board utilizes a ESP8266 12E wifi chip. The ESP8266 12E is, as all the ESP chips in this series, a low cost WiFi chip that comes with either a 80 or 160 MHz CPU and 64/96 KiB Memory for instructions and data. Per design, these chips have at least 16 GPIO pins and most of them feature an integrated antenna traced on the PCB. The 12E version, I will be using also features 20 GPIO pins and a 4MB Flash.
Now that we’ve talked about the ESP chip, what about the NodeMCU board? What are all these components around the ESP chip for?
Well, it’s similar to an Arduino board - a microcontroller can’t do much without components that allow other components to interface with it. Therefore the NodeMCU board adds a USB to Serial chip that allows direct programming of the ESP chip as well as a proper power supply for the chip and attached components. You could say that the NodeMCU board isn’t really necessary, but it’s certainly making our lifes easier as we won’t have to stick all these components together on a breadboard.
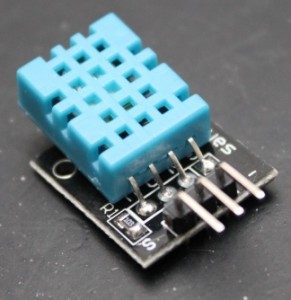
The DHT11 is probably the most widely used temperature and humidity sensor that there is. The sensor works with both 5V and 3.3V, has three pins (VCC, GND and DATA) and can measure temperatures from 0-50°C (32-122°F) with an error of ± 2°C (3.6°F) and Humidity from 20-90% RH with an error of ± 5% RH. The data pin is a digital interface; we don’t have to convert an analog voltage into degrees.
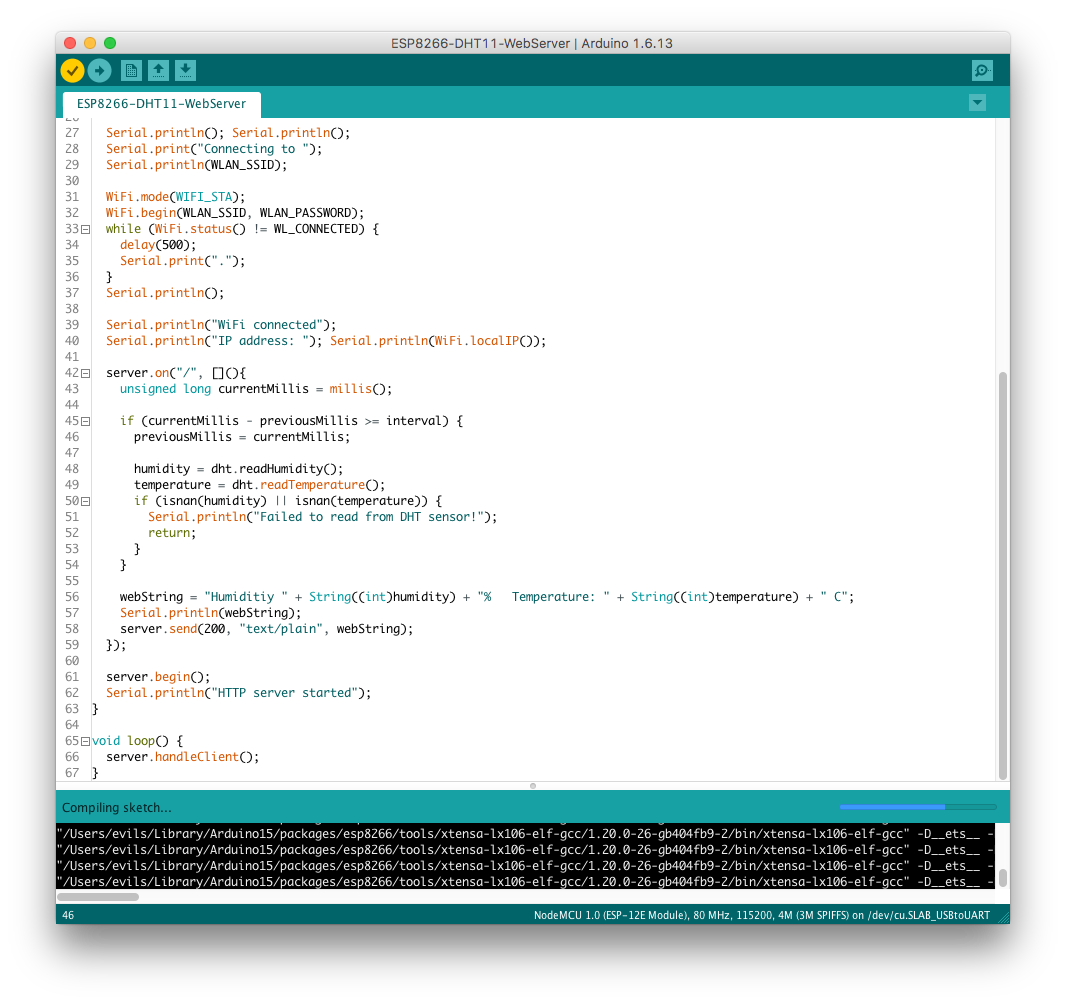
I won’t cover the basics of the Arduino IDE (Arduino.app) since my colleague Bryan already has in a great post of his, but I will show you quickly how you can use the NodeMCU board or any of the ESP8266 chips with the Arduino IDE. The Arduino IDE opened up a while back to 3rd party libraries, allowing 3rd parties to integrate their modules with the Arduino IDE. Some might say it was already possible before that happened and yes, that’s true, but it was a hack and used undocumented ways.
In order to use your ESP8266 module with the Arduino IDE, open the Library Manager under Tools -> Boards:... -> Boards Manager ... -> Filter: ESP8266. From there, the IDE should filter your search results down to one entry “esp8266 by ESP8266 Community”. Click on that field and click on “Install”.
Now you are able to select your NodeMCU module from the Tools section in the Arduino IDE and set the port and baud you’re using. CPU and Flash Size can be left as the IDE suggest it in most cases, Baud will most likely be 115200.
Wiring
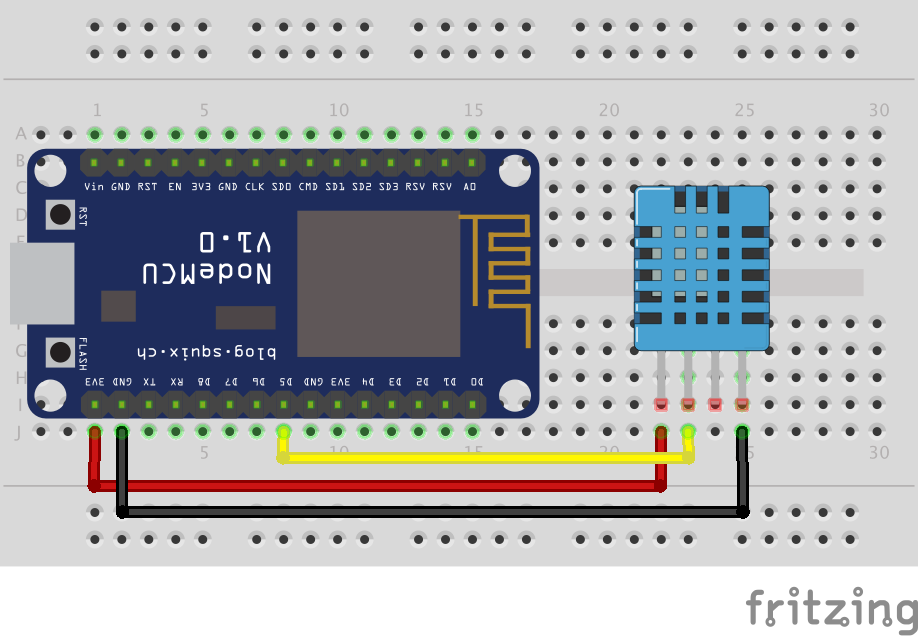
The wiring is pretty straight forward with a NodeMCU module.
NodeMCU/ESP8266             DHT11
3V3                         VCC
GND                         GND
D5(or any Dx)               DATA
If you’re using anything else than a NodeMCU module, you would have to adjust the DATA pin to your needs depending on what USB to Serial solution you are using. Feel free to ask (with sufficient information) in the comments if you’re having trouble on the wiring.
Now that everything is wired, we can go on to program the ESP8266 to read and provide the DHT11’s data as JSON and text over HTTP.
We’re going to use 4 different libraries for that: DHT Sensor Library, ArduinoJson, ESP8266Wifi and ESP8266WebServer (both should be built-in). You can install all of those with the Library Manager under Sketch -> Include Library -> Library Manager ....
Create a new Arduino Sketch and copy the following code into the sketch:
    #include <ArduinoJson.h>
    #include <ESP8266WiFi.h>
    #include <ESP8266WebServer.h>
    #include <DHT.h>

    #define DHTTYPE   DHT11
    #define DHTPIN    14

    #define WLAN_SSID     ""
    #define WLAN_PASSWORD ""

    DHT dht(DHTPIN, DHTTYPE, 11);
    ESP8266WebServer server(80);

    float temperature, humidity;
    unsigned long previousMillis = 0;
    const long interval = 2000;

    void setup() {
        Serial.begin(115200);
        delay(10);

        dht.begin();
        humidity = dht.readHumidity();
        temperature = dht.readTemperature();

        Serial.println(); Serial.println();
        Serial.print("Connecting to ");
        Serial.println(WLAN_SSID);

        WiFi.mode(WIFI_STA);
        WiFi.begin(WLAN_SSID, WLAN_PASSWORD);
        while (WiFi.status() != WL_CONNECTED) {
            delay(500);
            Serial.print(".");
        }
        Serial.println();

        Serial.println("WiFi connected");
        Serial.println("IP address: "); Serial.println(WiFi.localIP());

        server.on("/dht11", HTTP_GET, [](){
            unsigned long currentMillis = millis();

            if (currentMillis - previousMillis >= interval) {
                previousMillis = currentMillis;

                humidity = dht.readHumidity();
                temperature = dht.readTemperature();
                if (isnan(humidity) || isnan(temperature)) {
                    Serial.println("Failed to read from DHT sensor!");
                    return;
                }
            }

            String webString = "Humidity " + String((int)humidity) + "%   Temperature: " + String((int)temperature) + " C";
            Serial.println(webString);
            server.send(200, "text/plain", webString);
        });
        server.on("/dht11.json", [](){
            unsigned long currentMillis = millis();

            if (currentMillis - previousMillis >= interval) {
                previousMillis = currentMillis;

                humidity = dht.readHumidity();
                temperature = dht.readTemperature();

                if (isnan(humidity) || isnan(temperature)) {
                    Serial.println("Failed to read from DHT sensor!");
                    return;
                }

                Serial.println("Reporting " + String((int)temperature) + "C and " + String((int)humidity) + " % humidity");
            }

            StaticJsonBuffer<500> jsonBuffer;
            JsonObject& root = jsonBuffer.createObject();
            root["temperature"] = temperature;
            root["humidity"] = humidity;

            String jsonString;
            root.printTo(jsonString);

            Serial.println(jsonString);
            server.send(200, "application/json", jsonString);
        });

        server.begin();
        Serial.println("HTTP server started! Waiting for clients!");
    }

    void loop() {
        server.handleClient();
    }
Before you can upload and test the code, there are a few things you have to adjust for your WiFi settings and a few things I would like to explain.
First, you want to change Line 7 with the pin you used to connect your DHT11 Data line to your ESP8266. If you have been using D5 as I suggested in the wiring section, 14 is the correct number here. For everything else, see NodeMCU Pinout. Also, if you are using a DHT22, which also works, change the line just above that to DHT22. Second, you want to add your wifi settings in line 9 + 10 where it says WLAN_SSID and WLAN_PASSWORD. Put your WiFi SSID in between the quotation marks.
This should get you going. Go ahead and upload the sketch to your NodeMCU. We’re going to give it a test run before I continue explaining what you’ve just uploaded to your NodeMCU and ran on your WiFi…
Now that you’ve uploaded the sketch to your module, it should automatically connect to your wifi and you can access it with any web browser. To get your module’s IP address, either use the Serial Monitor under Tools in the Arduino IDE and watch for the “IP Address: …” output, or scan your network (e.g. with fing). Once you have the IP address, go ahead and put it in your browser’s address bar add /dht11 behind the address, hit enter, and you should be getting DHT11 sensor data on your screen.
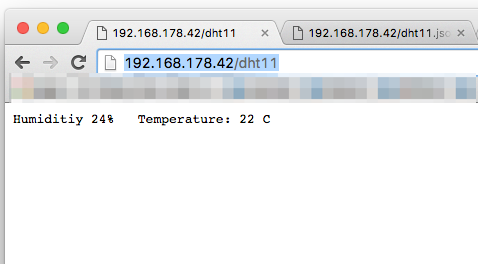
That was easy, wasn’t it?
There’s one more endpoint you can query, that’s /dht11.json. The data you just saw is also available formatted in the JSON format, so that we could pick it up with possible clients.
How would we do it?
Let’s have a look over the interesting parts of the sketch. Again, I won’t go over the things that have been covered before, therefore I will spare you details on how we’ve read from the DHT11 sensor and we go straight ahead to checkout the ESP/Wifi stuff.
ESP8266WebServer server(80);
First we have to initialize our server by creating a server handle with the port number as argument. As we’re going to use HTTP, we’re going to use port 80.
Next, we want to tell the ESP which mode to run. That’s going to be station infrastructure mode for us (WIFI_STA) and then we can begin to connect to our Wifi network.
    WiFi.mode(WIFI_STA);
    WiFi.begin(WLAN_SSID, WLAN_PASSWORD);
After that we wait until we have a valid connection by checking on the status of our wifi module WiFi.status() != WL_CONNECTED.
Once we have all of this initial setup done, we can register endpoints with instructions for what to do when we hit each endpoint. The method is pretty straight forward server.on(const char *uri, HTTPMethod method, THandlerFunction fn), so all we need to provide is a URI for the endpoint this should refer to, tell it which HTTP method to respond to and a handler function.
In our case, we call this method like this for the "/dht11" endpoint:
    server.on("/dht11", HTTP_GET, [](){
        unsigned long currentMillis = millis();

        if (currentMillis - previousMillis >= interval) {
            previousMillis = currentMillis;

            humidity = dht.readHumidity();
            temperature = dht.readTemperature();
            if (isnan(humidity) || isnan(temperature)) {
                Serial.println("Failed to read from DHT sensor!");
                return;
            }
        }

        String webString = "Humiditiy " + String((int)humidity) + "%   Temperature: " + String((int)temperature) + " C";
        Serial.println(webString);
        server.send(200, "text/plain", webString);
    });
Using "/dht11" as the path, we want this method to respond to HTTP_GET requests and we simply read temperature and humidity from the dht11 sensor, put the results in a string and we send it back as "text/plain" with a status code of 200 to the requesting client.
The JSON endpoint is not very different, here’s the code:
        server.on("/dht11.json", [](){
            // ... DHT11 Sensor read has been removed to focus on the JSON part

            StaticJsonBuffer<500> jsonBuffer;
            JsonObject& root = jsonBuffer.createObject();
            root["temperature"] = temperature;
            root["humidity"] = humidity;

            String jsonString;
            root.printTo(jsonString);

            Serial.println(jsonString);
            server.send(200, "application/json", jsonString);
        });
All we have to do to create our JSON output is to create a buffer and allocate it to the right size. I chose 500 B, which is more than we need. On top of that buffer we create a JsonObject and add both the temperature and humidity as keys with their respective values. Before we can send it back to the client, we have to convert our Json object into a compatible format for our send command and then we send it off with the proper Content-Type header.
We end the setup() function with a server.begin() command and we go over to configure the loop() function.
This one is pretty easy, we just have to issue a server.handleClient() call as all we want to do once the module loops is to make sure that we handle incoming client requests.
And that’s it! That’s basically all the code needed to have a mobile temperature and humidity station that is providing all the data over HTTP.
In the next episode in this series we’re going to implement MQTT and we’re going to look at multiple solutions on how we can visualize our MQTT data and use it.
If you had any problems in this post along the way, feel free to post your questions in the comments. Otherwise see you for episode 2.